
Working with 32 bit TIFF files in Lightroom 4 and 5
We are all familiar with the use of HDR software to get realistic (sometimes) images in very contrasty scenes. Typically you take 3-5 images at differing exposure values and combine them all into one image that more closely represents the image as you saw it. This can work well if not overdone, but sometimes produces extra grain and artifacts (lighter edges around objects) that don’t look very good!
Lightroom gave us a new tool and approach to this issue with release 4 onwards – the ability to handle 32 bit TIFF files. A JPEG normally uses 8 bits of information (256 shades) to handle the brightness of each color, 16 bit files are quite common and give a lot more granularity of shade but a 32 bit image can show a phenomenal amount of detail between pure white and black. Unfortunately, our monitors or printers can’t show this wide dynamic range and so we need a way to convert to a more normal image for final display and print – enter Lightroom 4 and 5 and the capabilities of Photoshop to merge multiple images into one 32 bit file. You can do this in Camera Raw as well, but I just prefer Lightroom.
Before we start with a worked example, one change to the Preferences of Lightroom is required to make this easy – change the File Format of images being edited in Photoshop to TIFF.
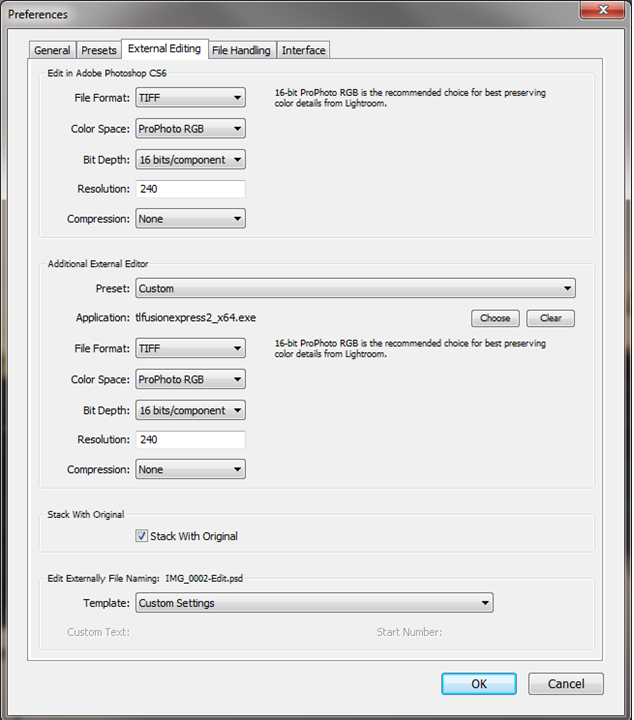
Preference settings
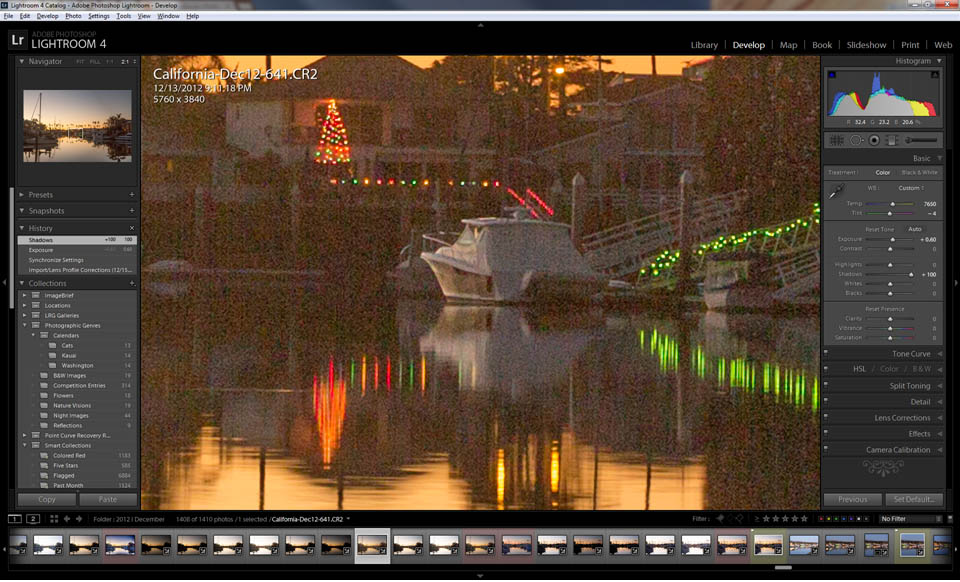
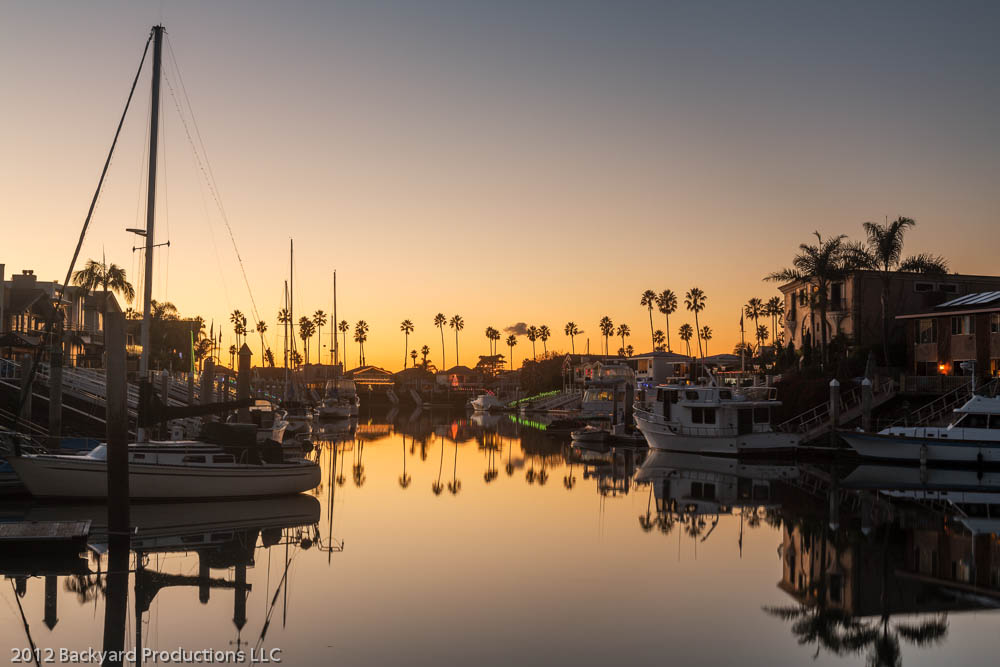
In the example, I had taken five exposures one stop apart – a total range of five stops. The camera was mounted on a tripod for this late evening shot with exposures in the 1 second range. This first shot from Lightroom shows the five exposures with the “normal” one enlarged. As you can see from the histogram, it is well exposed with no burnt out highlights and very few black areas. As a picture, though, the boats are very dark and it is hard to really make out the Christmas decorations reflected in the still water. I highlighted the five shots, right clicked and chose “Edit in..” and then “Merge to HDR Pro in Photoshop.”
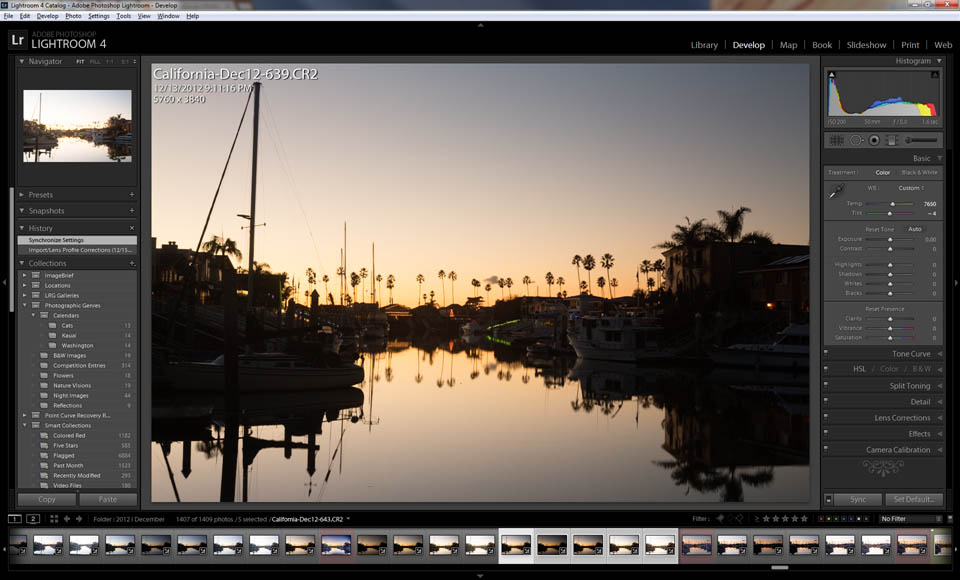
Exporting to Photoshop
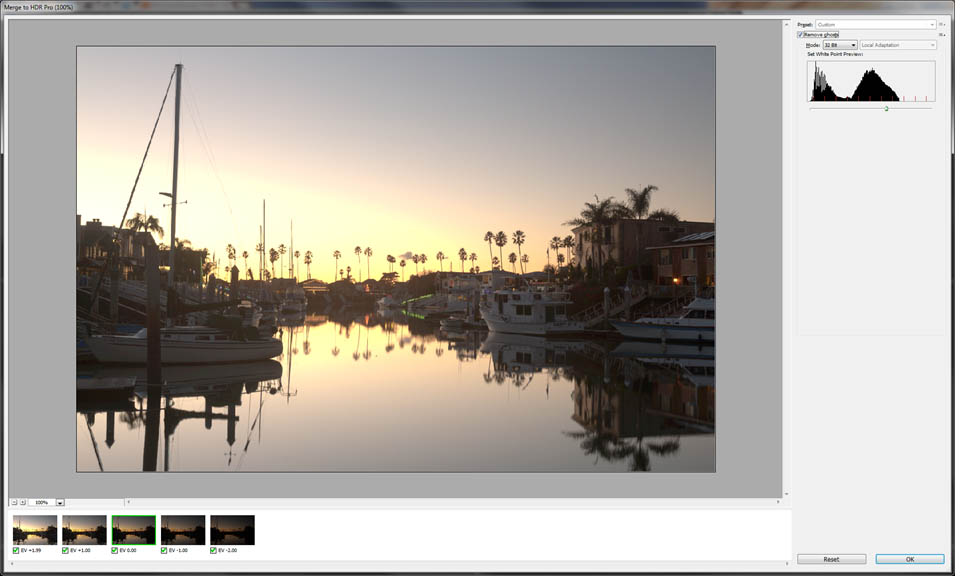
Lightroom exports all the images to Photoshop which opens the HDR Pro window. Nothing to change here – although you can select the “Remove Ghosts” option and also choose which of the five images to use as the “master” when looking at movement between the frames. The image looks nothing special at this stage – just click OK to move on.
32 bit image in Photoshop
Photoshop aligns the images, removes ghosts and combines all the five exposures into one 32 bit file. It still doesn’t look much like a finished image as our monitors just cannot display the broad dynamic range hidden in the file.

Photoshop prior to Save
At this stage, all you need do is to save the file using “File: Save” and close the file in Photoshop. Behind the scenes, Photoshop is writing the image to a 32bit TIFF format and adding that to the Lightroom Library.
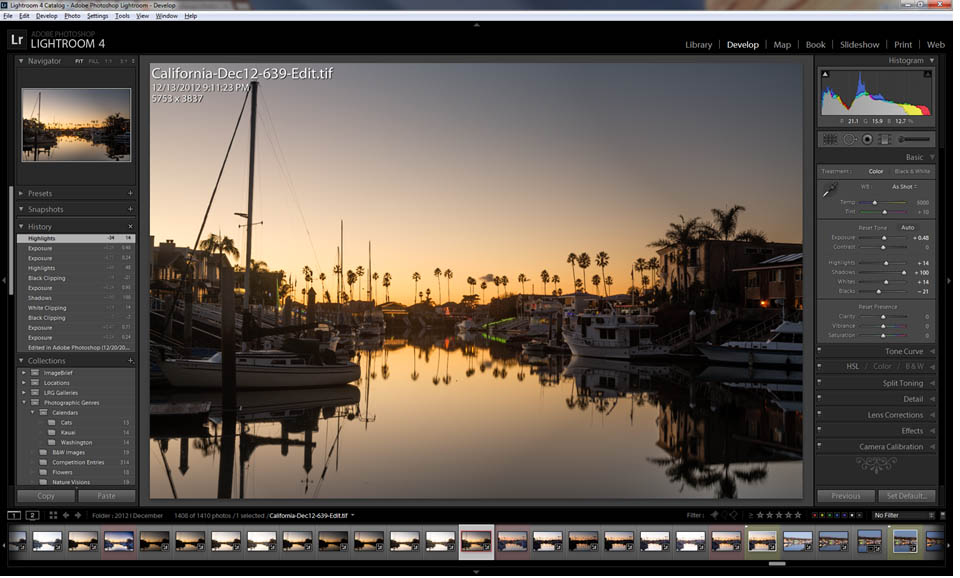
Back in Lightroom we have the new TIFF file ready for editing. Here is where the magic begins. You can use the normal editing tools on this enhanced dynamic range file, but the difference is that major changes in the exposure, highlights or shadows sliders have an enormous amount of hidden data to work with.
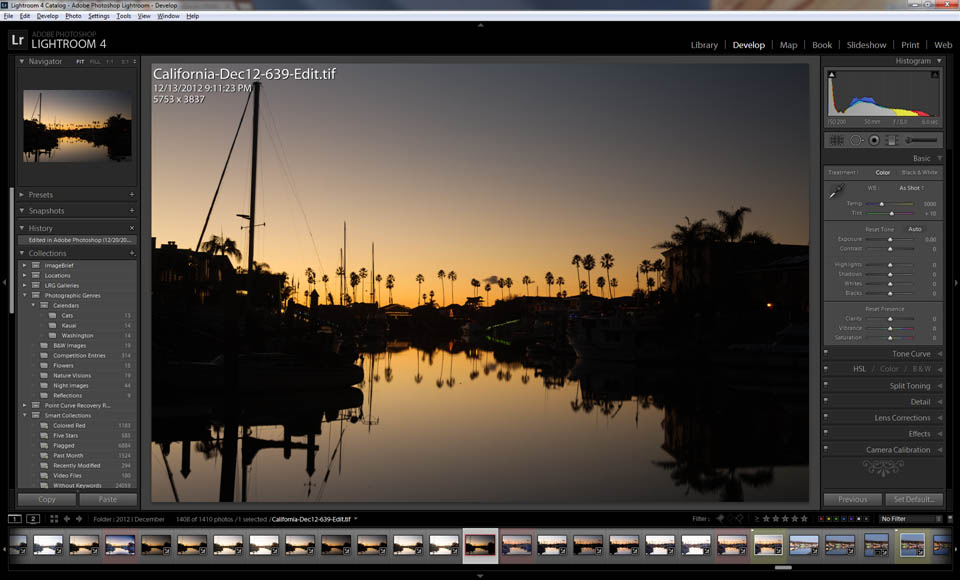
Back to Lightroom
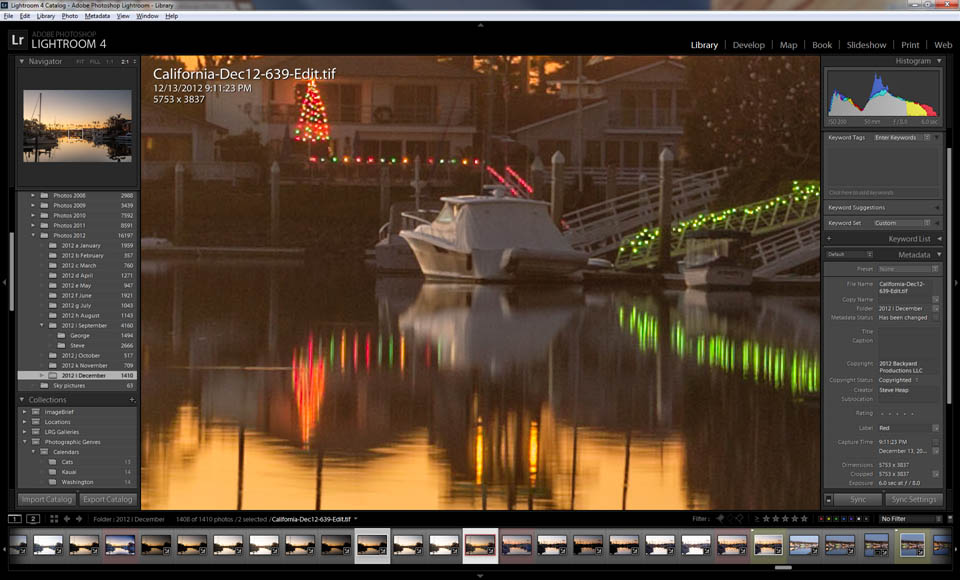
Here is the file as it arrives from Photoshop. I normally set the white point with the “White” slider (holding down the Alt key until the first areas start to show burnt out highlights. Then set the black point in the same way with the “Blacks” slider. Then you can bring out all the detail in the boats by sliding the “Shadows” slider over to the right. Normally this can introduce a lot of noise if overdone, but here you are using all the information from the five original exposures in one seamless action. In the final edit, I moved the exposure up a bit, reduced the highlights slightly and moved Shadows fully to the right to add enough light to the boats and houses to make it look realistic (and not HDR like!)
Improved shadow detail
If I do a side by side comparison with the exposure that best matches the output, we can see the big difference in the lighting around the boats:
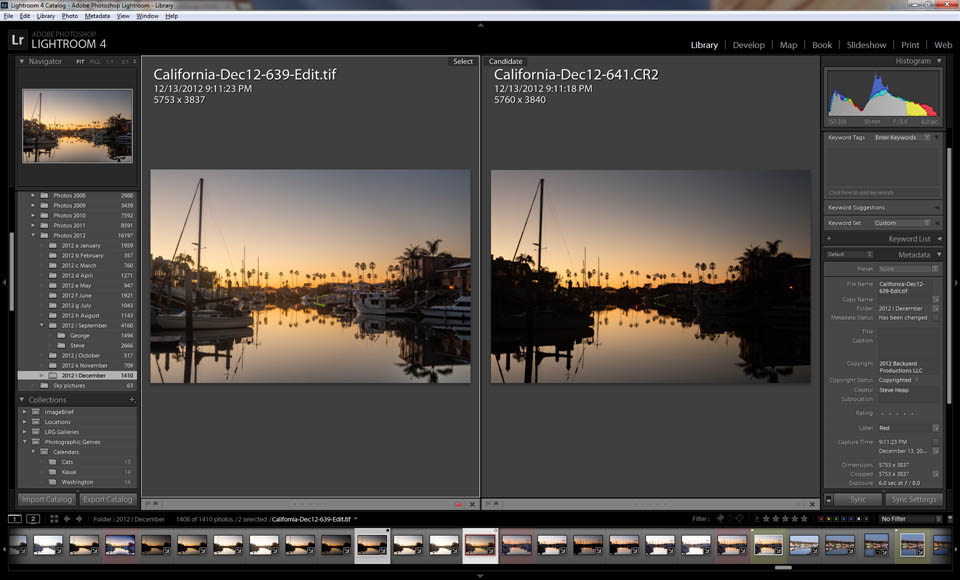
Comparison of before and after
The difference in exposure around the boats is clearly visible – but what does the detail look like?
This first image is from the shot on the right focusing in on the lights and one of the boats in the center of the shot. This image is enlarged to twice full size – a 200% enlargement. I boosted the shadow slider to try to get a similar level of brightness in the boats:
Boosting shadows in original file
As you can see, a lot of noise – a pretty useless image (especially if you plan to sell it as a stock photo). Now the same part of the image from the 32bit TIFF file:
Much better detail from 32 Bits
As you can clearly see – this is a really smooth and well exposed shot – no sign of noise, nice gradients of color and shade in the reflections and a lot of detail in the Christmas tree lights – no blow out of the highlights.
Here is the final shot after a little work to remove any names and identifying marks on the boats!
Final stock image
Overall, I think we have a great new tool in Lightroom with this ability to edit 32bit files using tools that we already know – and get great detail and dynamic range out of scenes that are too contrasty for a single shot, but need a delicate touch to avoid becoming totally unrealistic. I hope you find it as useful as I have – this is now my “go to” technique for evening and night shots.


Thanks for that tutorial. Didn’t know about this specific method, anxious to try it out! ; )