
How to take great images in dark buildings
One of the things that proved invaluable on my travels was the ability to take great images in dark indoor spaces. Of course, it would be nice to use a tripod and a low ISO, but almost all churches and palaces don’t allow tripods and there are few places where you could even rest your camera or use a small portable tripod. Modern cameras are getting better each year in terms of noise performance, but for stock images, the agencies generally want perfection! What about noise reduction techniques – those are good for low levels of noise, but they work by smoothing or averaging out the values of the pixels to remove the noise and so the edges and details can get softer as well.
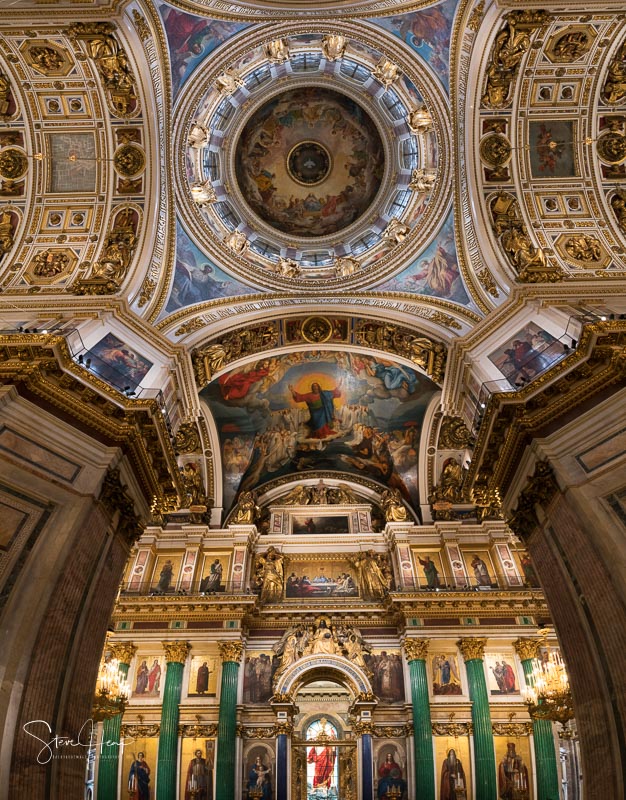
So how do we get panoramic shots like this in a dark cathedral?
My technique is to first really bump up the ISO such that you can set a suitable aperture (F7.1 in this case as there were some significant differences in distance from the camera and although the focal length was just 20mm I wanted everything to be in focus. In this particular case, I wanted an exposure of about 1/50th second and so the ISO ended up being 6400 – reasonably noisy, even on a Sony A7Rii. To get a perfect image, I set the shutter to fast continuous shooting, focus and while trying to keep as still as possible, fire off 5 or 6 shots in quick succession. People might think you are strange, but the results will be worthwhile!
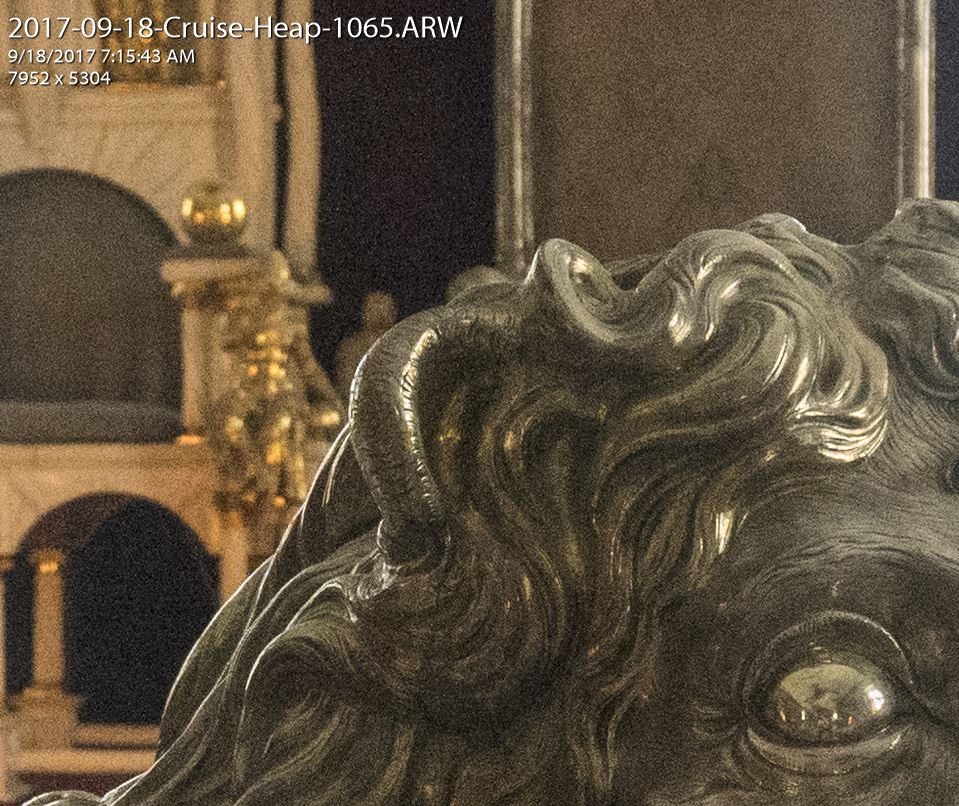
Then in Lightroom, I edit the first of the series to bring down any blown out areas and generally set the exposure and shadow settings to give me the best image I can get. I don’t touch the noise reduction settings. Here is an example of one image blown up to 100% showing the noise that I am seeing in the shadow areas in particular. This was at 6400 ISO as well:
Then copy those edit settings to the other images in the series. Then select all images and choose Edit In: Open as Layers in Photoshop. This will open all the 5 raw images in Photoshop in individual layers. Select them all and choose Edit: Auto-align Layers. This will correct for small movements that you made while taking the shots – there is generally a little bit of movement, but as you took all shots within the space of a second or so, not much movement.
Now for the magic. Select all the layers and right click and choose Convert to Smart Object from the menu. This will combine all the layers into one smart object layer, but will internally keep track of all the details of each file. In my case, the file size in Photoshop is now something like 1.3G. Then go to Layer: Smart Objects: Stack Mode: Median. What this does is to combine all the different layers in the smart object by choosing the median value at each pixel location. The median is the middle value of the five when they are arranged in order, and so it in effect produces the middle value of every pixel, which will tend to be the one that is the underlying exposure at that point. Remember that noise is a random variation in that underlying value so some exposures will be a bit above the value, others will be a bit below and this approach gives you the closest estimate of the real value. The file size will shrink now as the program has combined all the 5 layers together and you can “rasterize” the layer if you want to remove any spots or change the perspective in any way, before saving the file.
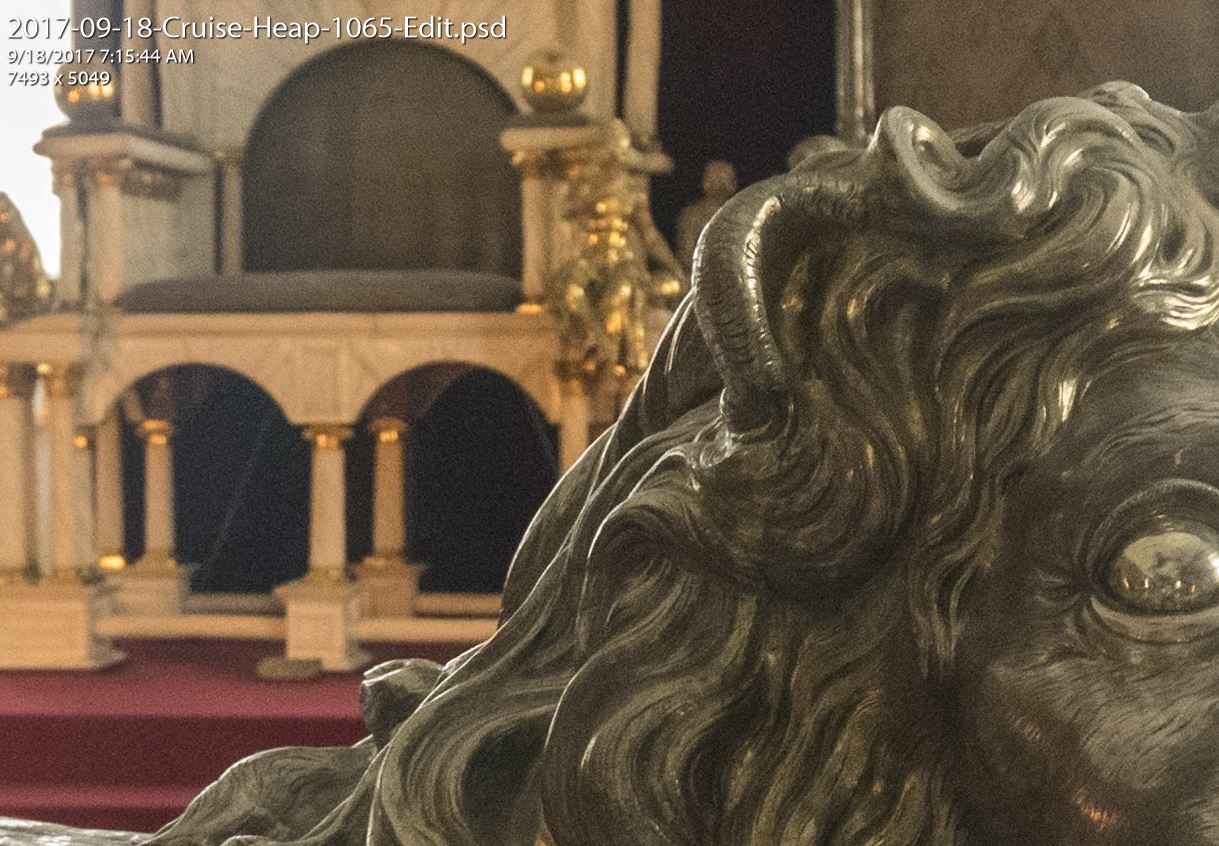
What you will notice now if you zoom in is that the noise has pretty much disappeared but the details of the subject are still there:
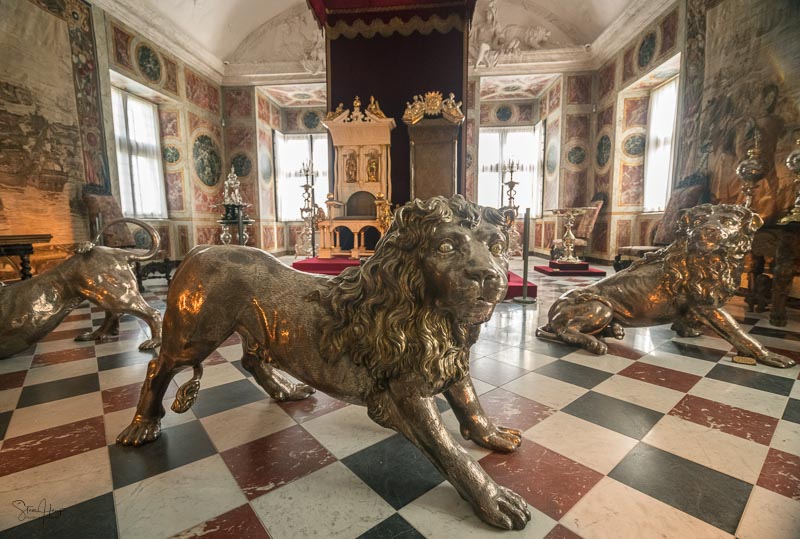
The overall image now looks like this. I’m not saying this is the best stock photo in the world, but it was interesting to me as a tourist!
Hope this helps you take better (and more) images on your travels. I’m sure most of the micros will reject this, but it might get sales occasionally on Alamy!

Very useful tip and detailed instruction! Thank you!
Thanks for the tip Steve, I had tried that in the past as a test but your article served as a needed reminder and added the idea of making a smart object … so I got a very nice “Oh Yeah” out of it. 🙂
Great – glad it helped!
Steve
Great tutorial, Steve. Living in Italy, I certainly visit a fair number of churches and have similar problems – this is useful advice.
Alamy would certainly be interested in such images and aren’t as picky with noise as the micros.
Alex
Why 5 or 6 shots in quick succession? Is the same result to shoot only one time, then in Lightroom create 5 or 6 vitual copies of the original shoot and apply the edit settings to the other vitual copies. Then elaborate in same way yoy describe in Photoshop. What’s the difference between your method and what I’ve explained? Thanks!!
Good question – at first glance, those two methods do appear to be the same! However, noise is a random variation around the true value of the brightness of each individual pixel in the image. So if the true value of a red pixel was supposed to be 100, then in each of the five shots I take, the value measured in each shot could be 90, 105, 95, 100, 110. All of them close to the real value of 100, but the variation is simply coming from the variable noise level. When we stack these five readings for that one pixel in order, we get 90, 95, 100, 105 and 110. The median (middle) value is 100 and that is the result that is shown in the final stacked image. In effect, for every pixel in the image we are finding the value that is closest to what the “real” level should have been. Taking your approach with duplicating the same file five times, all measurements will be exactly the same and so the stacked version will be identical to the input file – with all the noise present as before. Hope that makes a bit more sense!
Steve
This sounds promising – and yet simple to apply. Sheer greatness! The Canon 6D I sometimes use is already quite good with noise reduction – but with ISO 6400 the is of course always some dirt. And then again this might even work with iPhone SE cam, for example. I definitely try next time I visit a church! 🙂
cheers, t.
Yes, it should work with the iPhone – just take at least 5 shots to get a good chance of averaging out the noise. I find it works great in any dark building and you can really bump up the ISO to get a good quality hand held shot. If you really want to get clever you can do panoramas as well as HDR type shots with different exposures to balance out a bright window with the darker interior.